Workflow Settings
Workflow Settings affects both canvas editing and formal execution. Open it from the settings icon on a Workflow Management card or the workflow editor toolbar.
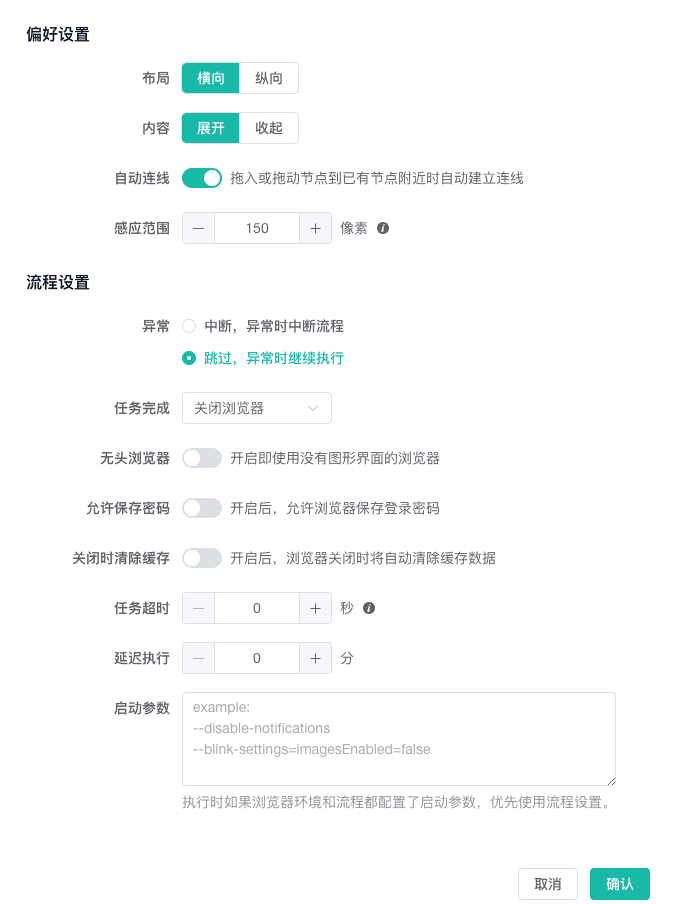
Defaults
New workflows use:
| Setting | Default | Purpose |
|---|---|---|
| Layout direction | Horizontal | Controls the Auto Layout direction |
| Node content | Expanded | Controls content display on canvas nodes |
| Auto-connect | Enabled | Connects nodes based on distance while dragging |
| Auto-connect distance | 150 pixels | Sets the connection detection threshold |
| Default error handling | Skip | Defines the initial behavior for a new node on error |
| On finish | Close browser | Determines whether the browser profile closes or remains open when the task completes |
| Headless mode | Disabled | Determines whether the browser window is hidden during execution |
| Save passwords | Disabled | Allows or blocks browser password saving |
| Clear cache on close | Disabled | Clears cache when the profile closes |
| Workflow timeout | 0 seconds | 0 means no total duration limit |
| Delayed start | 0 minutes | Wait time before workflow execution |
| Launch arguments | Empty | Additional browser launch arguments |
Layout Direction
Select Horizontal or Vertical. After switching, the editor updates node port directions and runs Auto Layout again.
- Horizontal: Suitable for many steps and few branches.
- Vertical: Suitable for narrow windows or top-to-bottom reading.
Layout changes node arrangement only, not connections or execution order.
Node Content
Choose whether canvas node information is expanded or collapsed by default. Collapsed nodes use less space in large workflows. Expanded nodes make summaries easier to inspect during troubleshooting.
Auto-connect
When enabled, the editor attempts to create or adjust a connection as a dragged node approaches a compatible position.
A larger distance can trigger connections farther away; a smaller one requires the node to be closer. For a dense workflow, reduce the distance or temporarily disable Auto-connect to avoid unintended connections.
Always review arrow direction and the execution path after dragging.

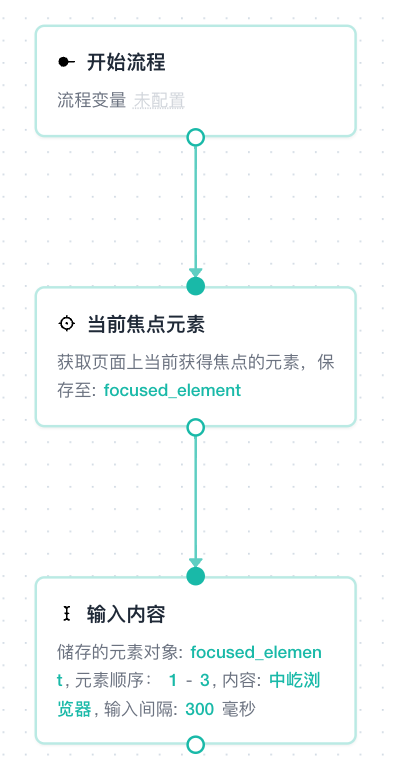
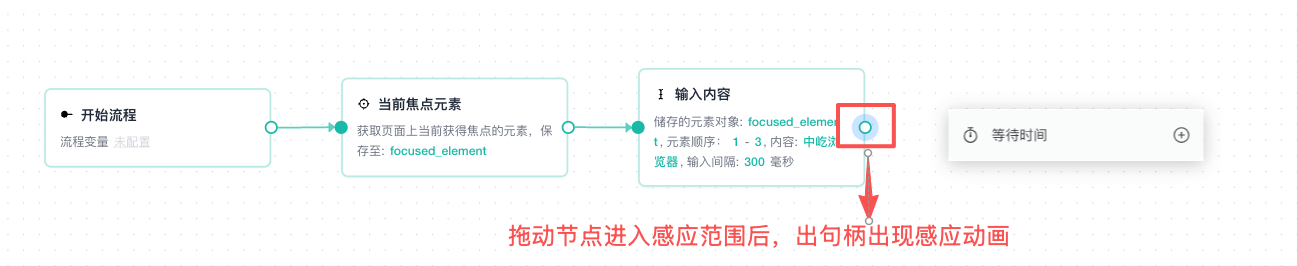
| Illustration | Description |
|---|---|
| Horizontal layout | Arranges node ports and Auto Layout horizontally |
| Vertical layout | Arranges node ports and Auto Layout vertically |
| Auto-connect detection | Attempts to connect or adjust nodes inside the detection distance, which defaults to 150 pixels |
Default Error Handling
The default defines the initial response for a new node:
- Stop Workflow: Stops the active execution path.
- Skip Current Node: Records the error and continues downstream.
A standard node can override this and select Run Alternative Actions to create a red error branch. The node-level setting takes precedence.
After recovery actions, the error branch can rejoin a downstream node on the normal path and continue with the shared operations. See Rejoin the Normal Path from an Error Branch for steps and an example.
Use Stop Workflow for critical operations. Skip only noncritical data that the business process permits to be absent.
Browser Behavior
On Finish
| Option | Function |
|---|---|
| Close browser | Closes the corresponding browser profile when the task completes |
| Keep open | Keeps the corresponding browser profile running after the task completes for further inspection or page operations |
When Keep open is selected, the browser profile and system resources remain occupied.
Headless Mode
Runs without displaying a browser window. Headless mode suits stable background tasks. Keep it disabled when first configuring page interactions so clicks, input, and navigation remain observable.
Save Passwords
Allows the browser to save passwords during workflow execution. Before processing sensitive accounts, confirm that local security policy and business requirements permit this behavior.
Clear Cache on Close
Clears cache when the profile closes. Test workflows that depend on cache state to prevent a different page state at the next launch.
Execution Limits
Workflow Timeout
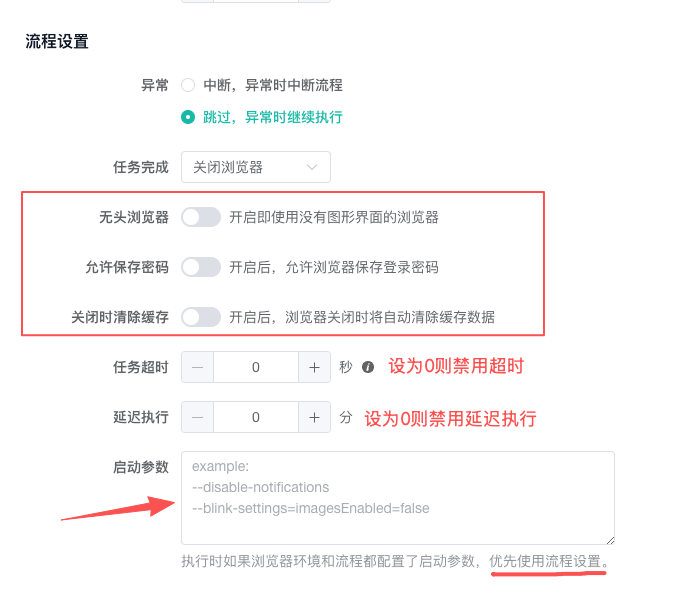
Limits total workflow duration in seconds. 0 means unlimited.
Workflow timeout differs from the per-profile execution timeout in a task. Review both during formal execution so a long workflow is not terminated early by the task timeout.
Delayed Start
Waits the configured number of minutes before workflow execution. Use it when a profile needs preparation time after launch, not as a substitute for waiting between nodes.
For page loading or API responses, use Wait for Duration, Wait for Element, or Wait for Request.
Launch Arguments
Add arguments to the browser launched for the workflow, such as a supported option that disables notification prompts.
When both the workflow and browser profile define launch arguments, workflow arguments take precedence. Debug again after changes to ensure that the browser starts and page features still work.
Save Settings
- Change the required options.
- Click Confirm in the dialog.
- If this is a new workflow, save it for the first time.
Confirming updates settings directly for a saved workflow. A new workflow requires its first save; select Save if an unsaved-changes prompt appears when leaving.
Related Guides
- Use the Workflow Editor: Learn Auto Layout, Auto-connect, and node error branches.
- Debug Automation Workflows: Validate browser behavior and execution limits.
- Task Management and Scheduling: Configure per-profile timeout, task type, and concurrency.