Create Browser Profiles in Bulk
Batch creation is designed for a set of profiles that use similar browser, operating system, and fingerprint policies. You can create up to 100 profiles in one batch, subject to the remaining profile capacity of the active team plan. To add capacity, see Purchase a Team Plan.
Open Batch Creation
- Go to
Browser Profiles. - Click the arrow next to
Create Profile. - Select
Batch Create. - Select
Quick CreateorAdvanced Configurationas required.
If the active team has no remaining capacity, remove profiles you no longer need or upgrade the plan first.
Enter the Batch Details
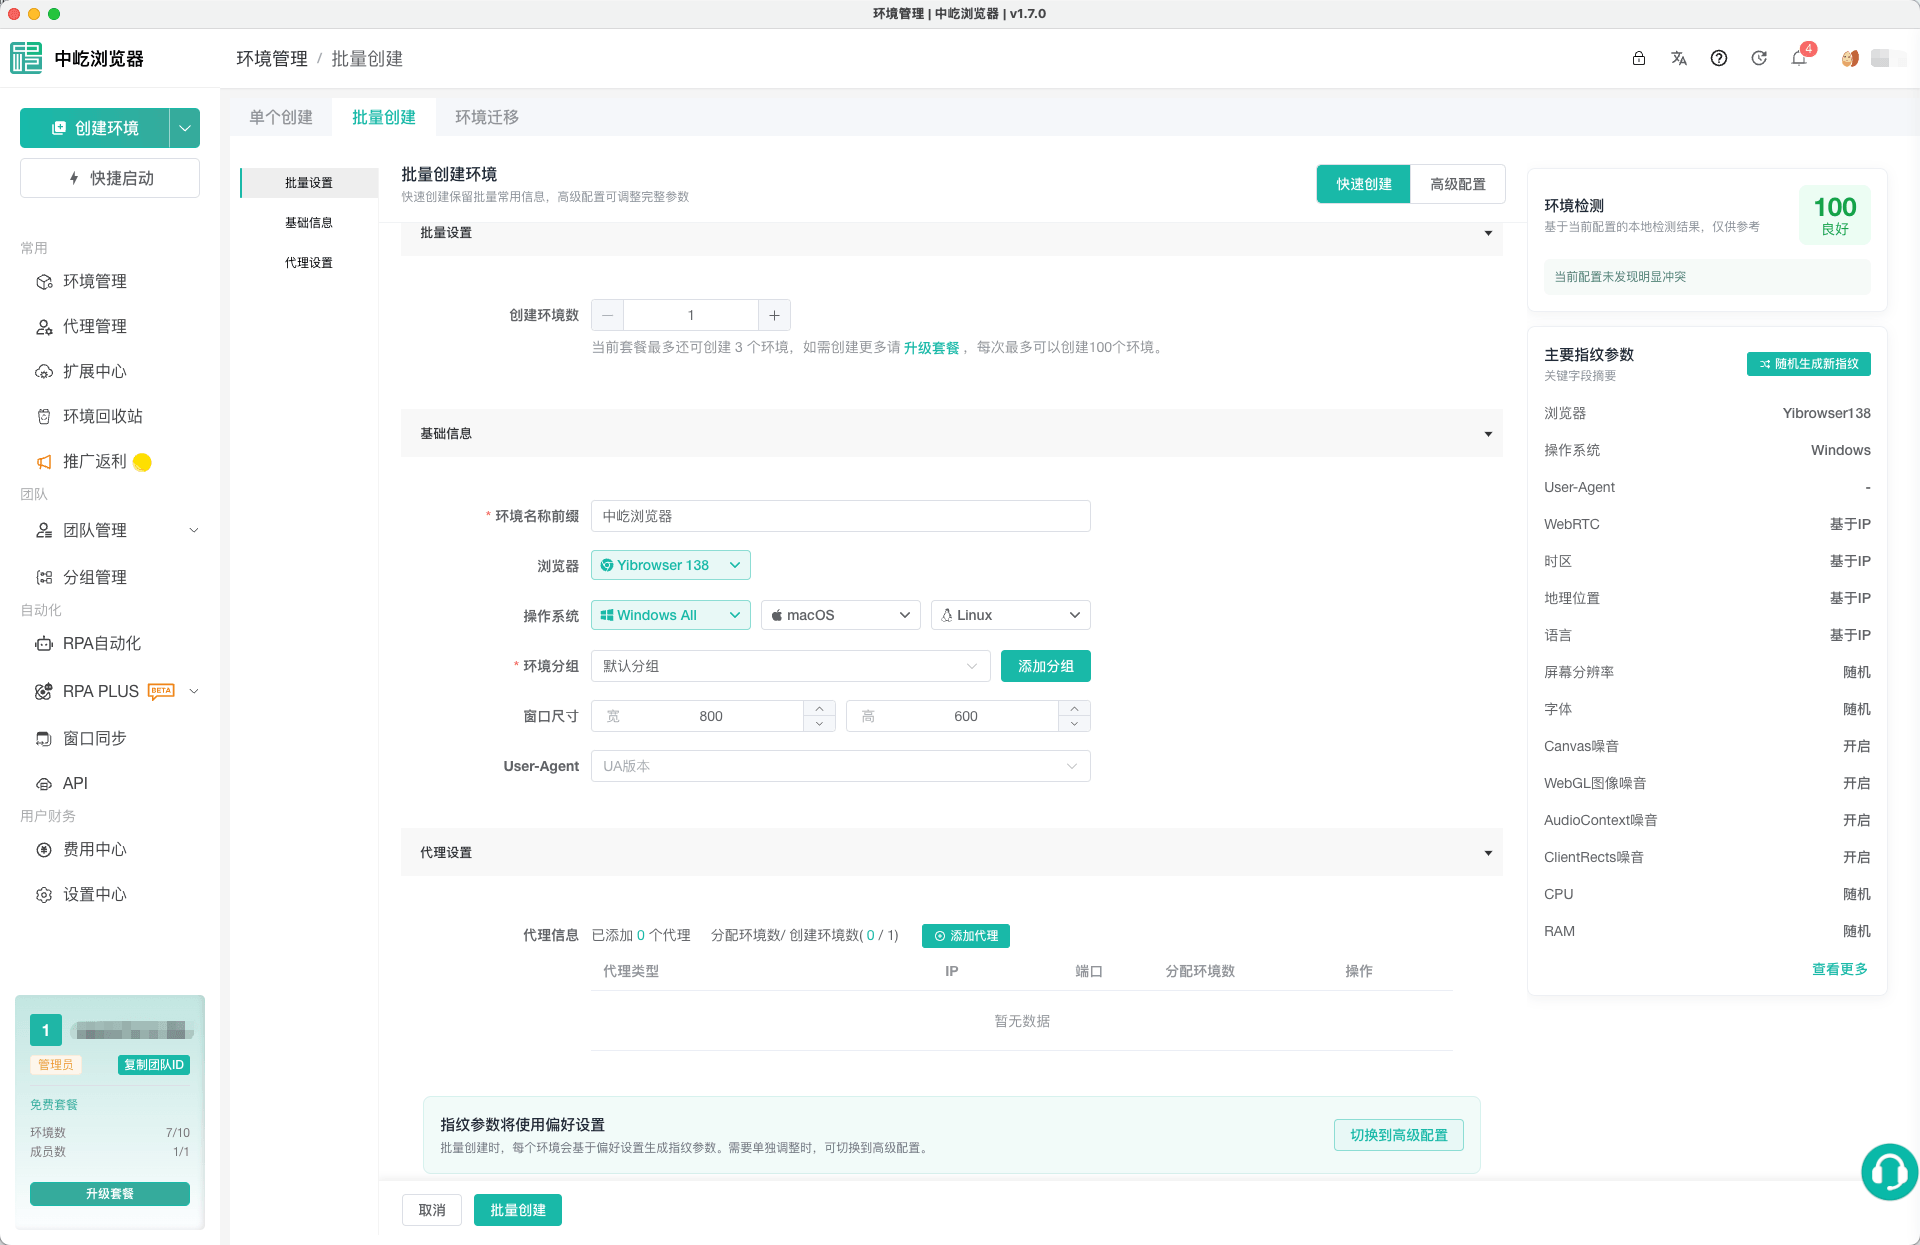
Complete the following fields under Batch Settings and Basic Information:
| Field | Description |
|---|---|
Number of profiles | Number of profiles to create; the available range is determined by the remaining capacity and per-batch limit |
Profile name prefix | Names are generated in the format Prefix_1, Prefix_2, and so on |
Browser | Browser engine and version shared by this batch |
Operating system | Operating system and version shared by this batch |
Profile group | Group assigned to the new profiles |
Window size | Width and height of every new profile window; the minimum is 300px |
UA version | User-Agent version range used by the batch |
Allocate Proxies
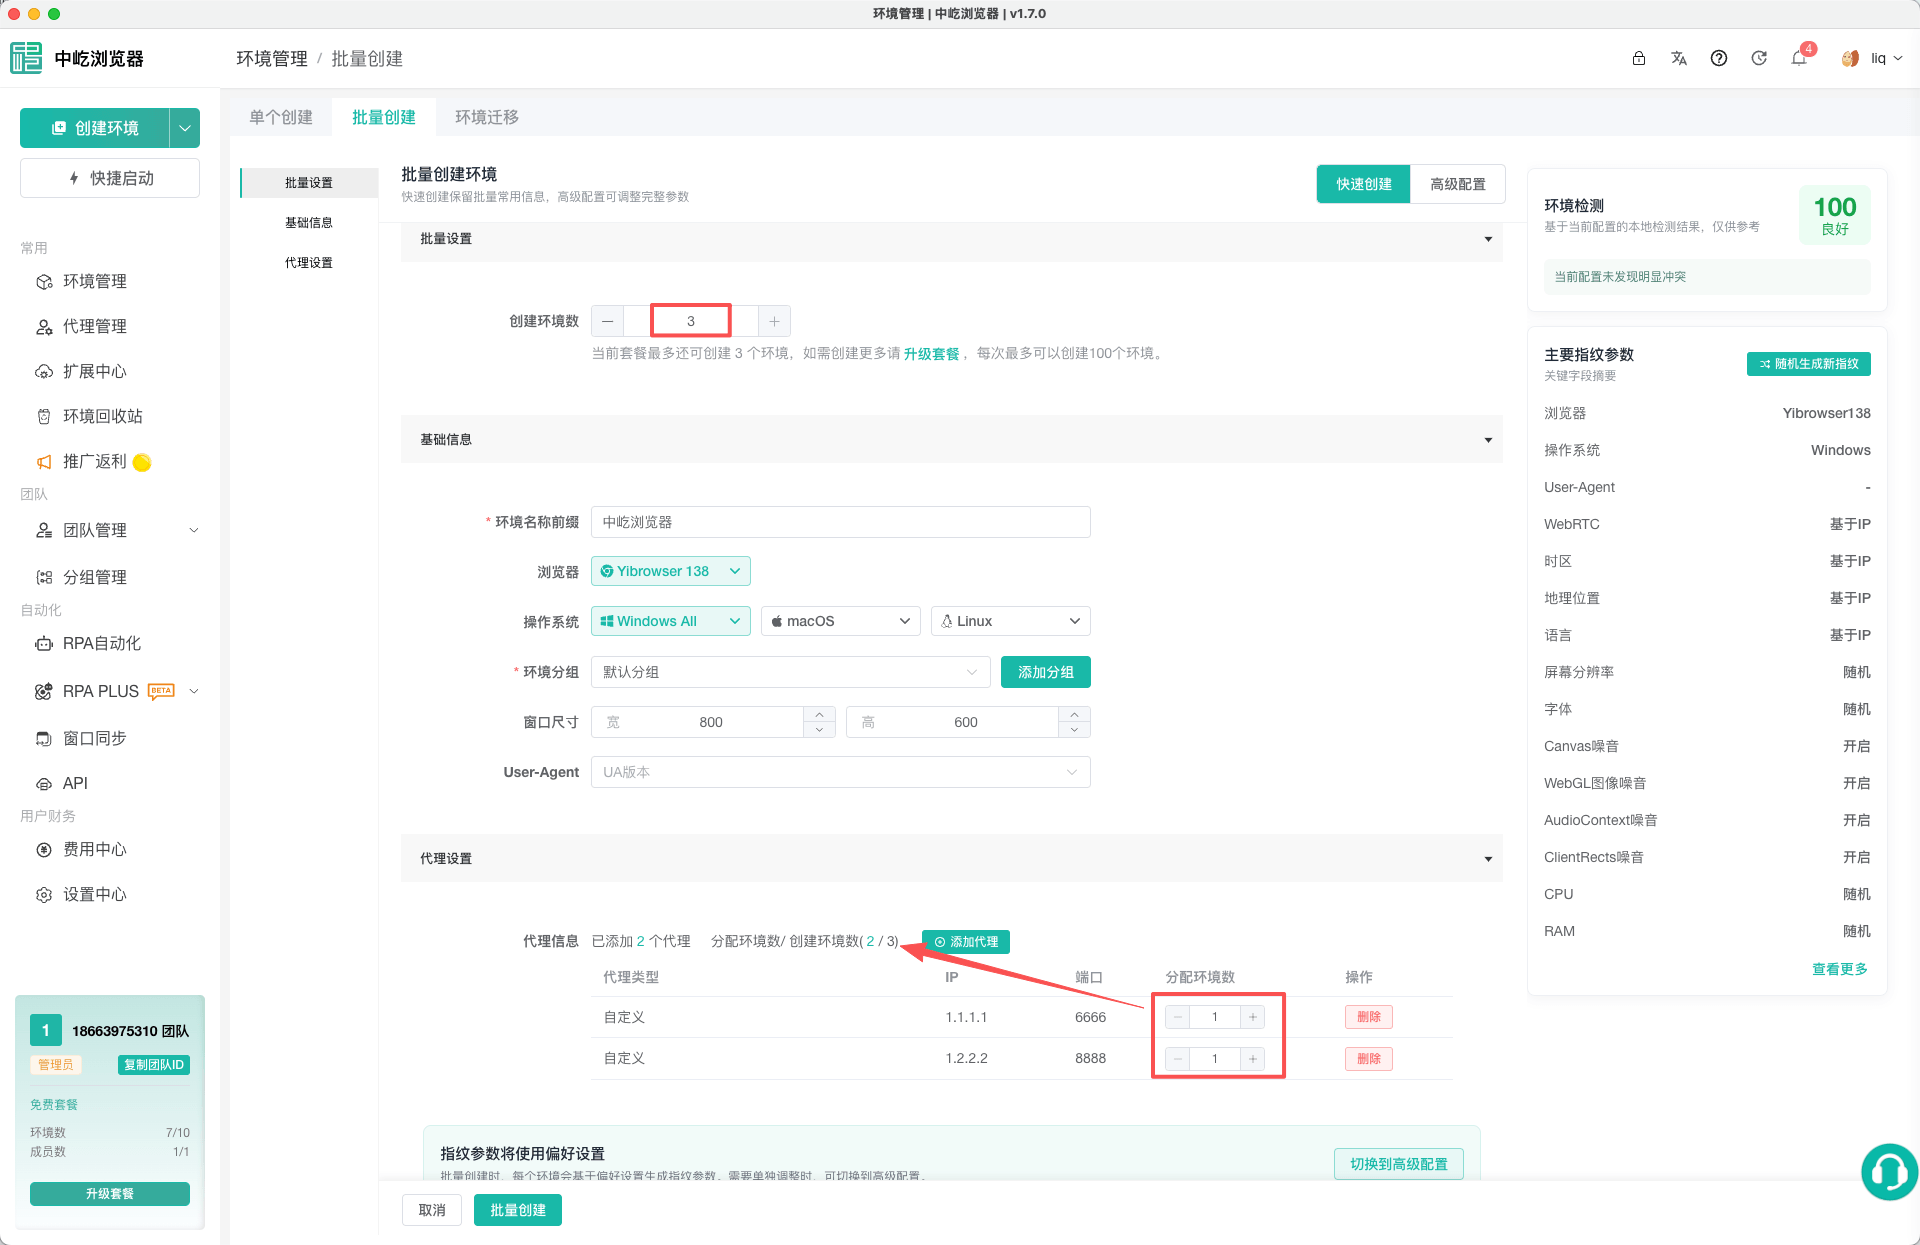
Proxy Settings displays the Number of proxies added and Profiles allocated / Profiles to create. If no proxy is added, all profiles in the batch use No Proxy. For guidance on proxy options, see Proxy Overview.
To use proxies:
- Click
Add Proxy. - Select
No Proxy,Custom,Proxy API, orSaved Proxy. - Enter or select the proxy details and confirm.
- In the proxy list, specify how many profiles should receive that configuration.
- Add other proxies until the number of allocated profiles matches the number to create.
One proxy configuration can be assigned to multiple new profiles. Unallocated profiles use No Proxy.
When adding a Proxy API, authentication defaults to Whitelist. Select Credentials and enter both the account and password when the provider requires proxy credentials. These credentials connect to the fetched proxy address; they do not authenticate the API URL.
Use Advanced Configuration
The Advanced Configuration tab also provides:
- Platform information.
Common Settingsfor images, video, audio, notifications, clipboard access, and network changes.Fingerprint Settingsfor WebRTC, time zone, geolocation, language, resolution, fonts, hardware information, and launch arguments.
Batch creation applies these shared settings to the entire batch and generates the corresponding fingerprint data for each profile. To set cookies, bind different accounts, or select different extensions for individual profiles, complete the batch first and then edit each profile. You can also centrally maintain accounts and extensions through Assign a Browser Profile and Select the Load Scope.
Submit the Batch
Click Batch Create at the bottom of the page. ZYBrowser validates the form, creates the profiles, and returns to the profile list when finished.
Before submitting, confirm that:
- The number of profiles does not exceed the remaining capacity shown on the page.
- The name prefix clearly identifies the batch.
- Proxy allocations match the number of profiles to create.
- The browser engine is supported on the current platform.
- Regional settings, the User-Agent, and hardware information do not contain obvious conflicts.
Batch creation does not provide a Create and Launch action. After creation, select the required profiles in the list and launch them in bulk.
Troubleshooting
No More Proxies Can Be Added
The page stops accepting proxies when the number of proxy entries or allocated profiles reaches the number of profiles to create. Adjust the allocation for each proxy or increase the batch size.
The Creation Limit Is Below 100
The page uses the smaller value of the remaining plan capacity and 100. Restored profiles also consume capacity again, so review both the profile list and Recycle Bin before making changes.
Profiles Do Not Launch Automatically
This is expected. Return to the profile list, select the profiles, and click Launch. Browser profiles can only be launched from the desktop client.
Next Steps
- Manage Browser Profiles in Bulk: Launch, move, share, or delete the profiles you created.
- Configure Fingerprints and Common Settings: Review the parameters available in Advanced Configuration.