Manage Members and Roles
The Members page displays roles on the left and members on the right. Roles define page and action permissions. A member's settings also determine the browser profile groups and proxies they can access.
Before defining roles, review the actions that require authorization under Browser Profiles, Proxies, and Extensions.
Create a Role
- Click
New Rolein the role panel. - Enter a role name.
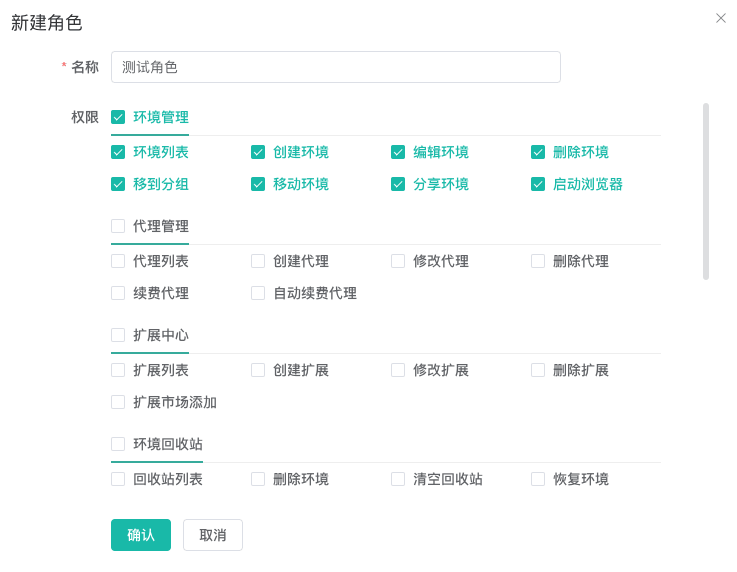
- Select the required permissions by module and save.
When an action permission is selected, the client also selects its required list permission so the role can see the page where the action is performed. Deleting a role cannot be undone. Confirm that no member still depends on it.
Edit Member Permissions
Find the member and click Edit. You can configure:
| Setting | Description |
|---|---|
Roles | Select one or more existing roles |
Authorized groups | Allow all groups or only selected browser profile groups |
Proxy authorization | No access, all proxies, or selected proxies; with no access, the member can see only proxies they created |
Notes | Record responsibilities or handover information |
Search members by username, nickname, or phone number. Point to Notes to edit them directly. Administrators and team owners cannot be selected for batch actions or deletion.
Enable, Disable, or Remove a Member
Use the status switch to disable a member. A disabled member cannot switch to the active team. Removing a member requires confirmation and affects only the current team; it does not delete the user's account.
If edit, delete, or status controls are unavailable, the current account lacks the corresponding member or role permission, or the record belongs to the team owner.
Log Out a Member
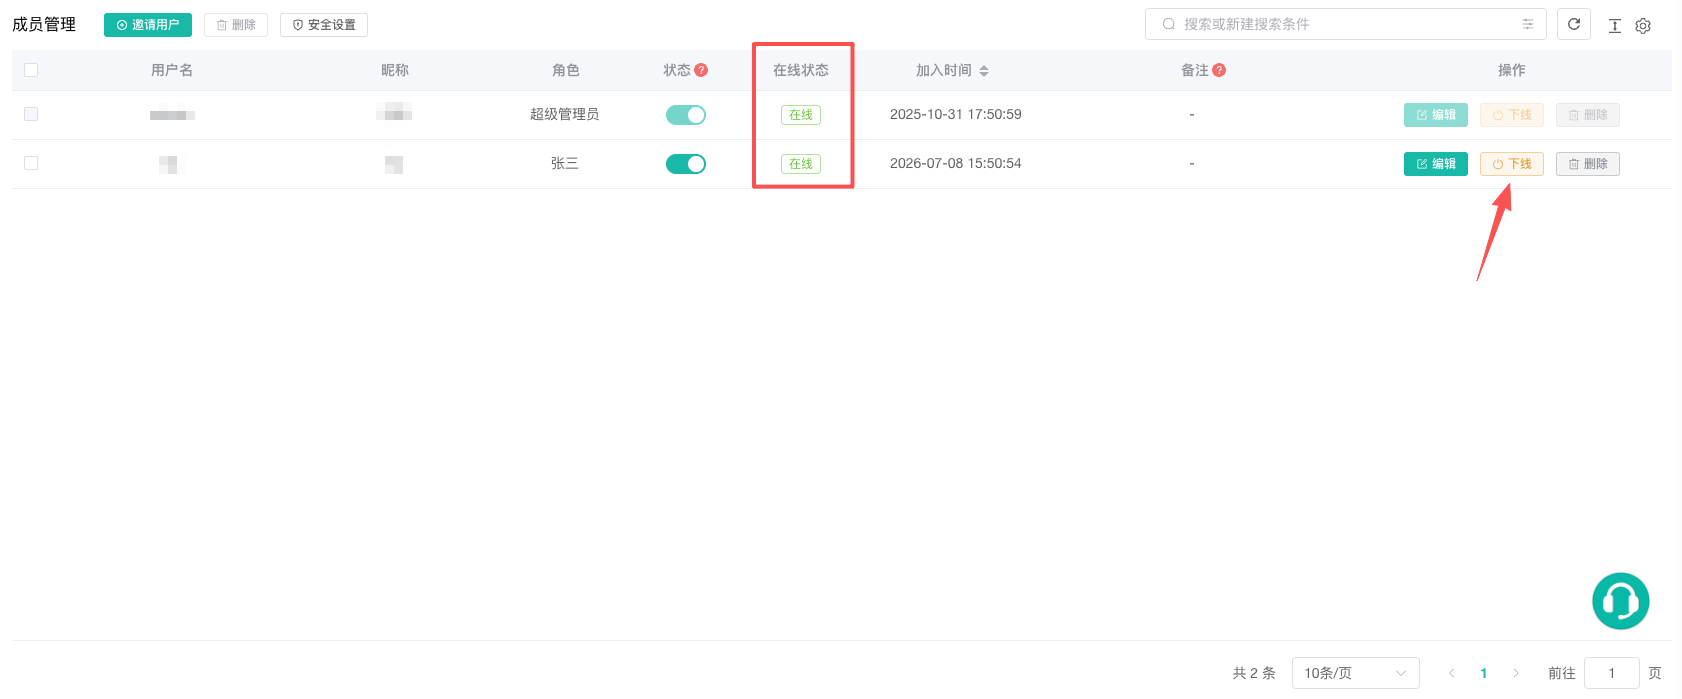
The Online Status column shows whether each member is currently online. To end a member's active sessions in the current team immediately:
- Find the online member.
- Click
Log Outin theOperationcolumn. - Verify the username in the confirmation message, then confirm.
After confirmation, all of that member's online devices receive a logout notification. Once the notification is sent, ZYBrowser refreshes the member list for the administrator and displays a Forced Logout dialog to the member, who must choose one of the following actions.
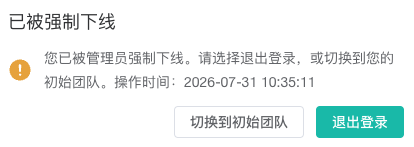
| Button | Description |
|---|---|
Switch to Initial Team | Switches ZYBrowser back to the account's initial team |
Exit Login | Logs out of the current account and returns to the login page |
Important
Both actions close all currently running browser profiles. Proceed with caution.
The administrator's Log Out action does not disable the member, remove them from the team, or delete the account. The action is available only for an online non-owner member, and the current operator must have permission to log out members. A team owner cannot be logged out.
Configure the Login IP Allowlist
The Login IP Allowlist is a security setting for the active team. It restricts the IP addresses that regular members can use when accessing the team. The Security Settings button above the member list is visible only to team administrators. To configure the allowlist:
- Click
Security Settingsabove the member list. - Enable
Login IP Allowlist. - Enter one IP address, CIDR range, or trailing-wildcard IPv4 address per line.
- Click
Save Settings.
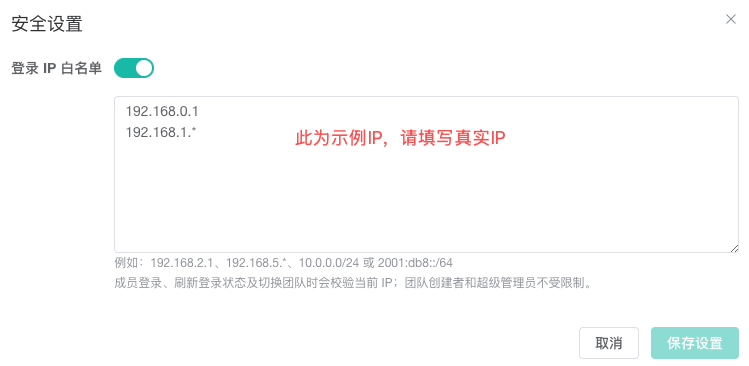
The allowlist accepts these formats:
| Format | Example | Description |
|---|---|---|
| Exact IPv4 | 192.168.2.1 | Allows only the specified IPv4 address |
| Trailing-wildcard IPv4 | 192.168.5.* | Supports * only as the final IPv4 segment |
- An enabled allowlist requires at least one entry. Blank lines are ignored, and ZYBrowser reports the line number of an invalid entry.
- The allowlist applies only to subsequent sign-in attempts. Users who are already signed in from an IP address outside the allowlist are unaffected: ZYBrowser does not log them out or switch teams automatically. When a member signs in from an IP address outside the allowlist, ZYBrowser defaults to the member's initial team.
- Team owners are exempt from the allowlist.
- After disabling the allowlist, click
Save Settingsto submit the change.