Create Your First Browser Profile
A browser profile is the basic unit of account isolation. Each profile stores its own cookies, cache, login sessions, and browser fingerprint. When using ZYBrowser for the first time, create a basic profile and confirm that you can save and launch it before adding proxies or custom fingerprint settings. For all available fields and submission options, see Create and Edit a Browser Profile.
Create a Browser Profile
- Open
Browser Profilesand clickNew Profile. - Under Basic Information, enter a recognizable profile name, such as
Test Profile-01. - Select a browser engine and operating system.
- If you need a proxy, select its protocol under Proxy Settings and enter the host, port, and other required details. Otherwise, keep the default settings.
- Review the settings and click
Save.
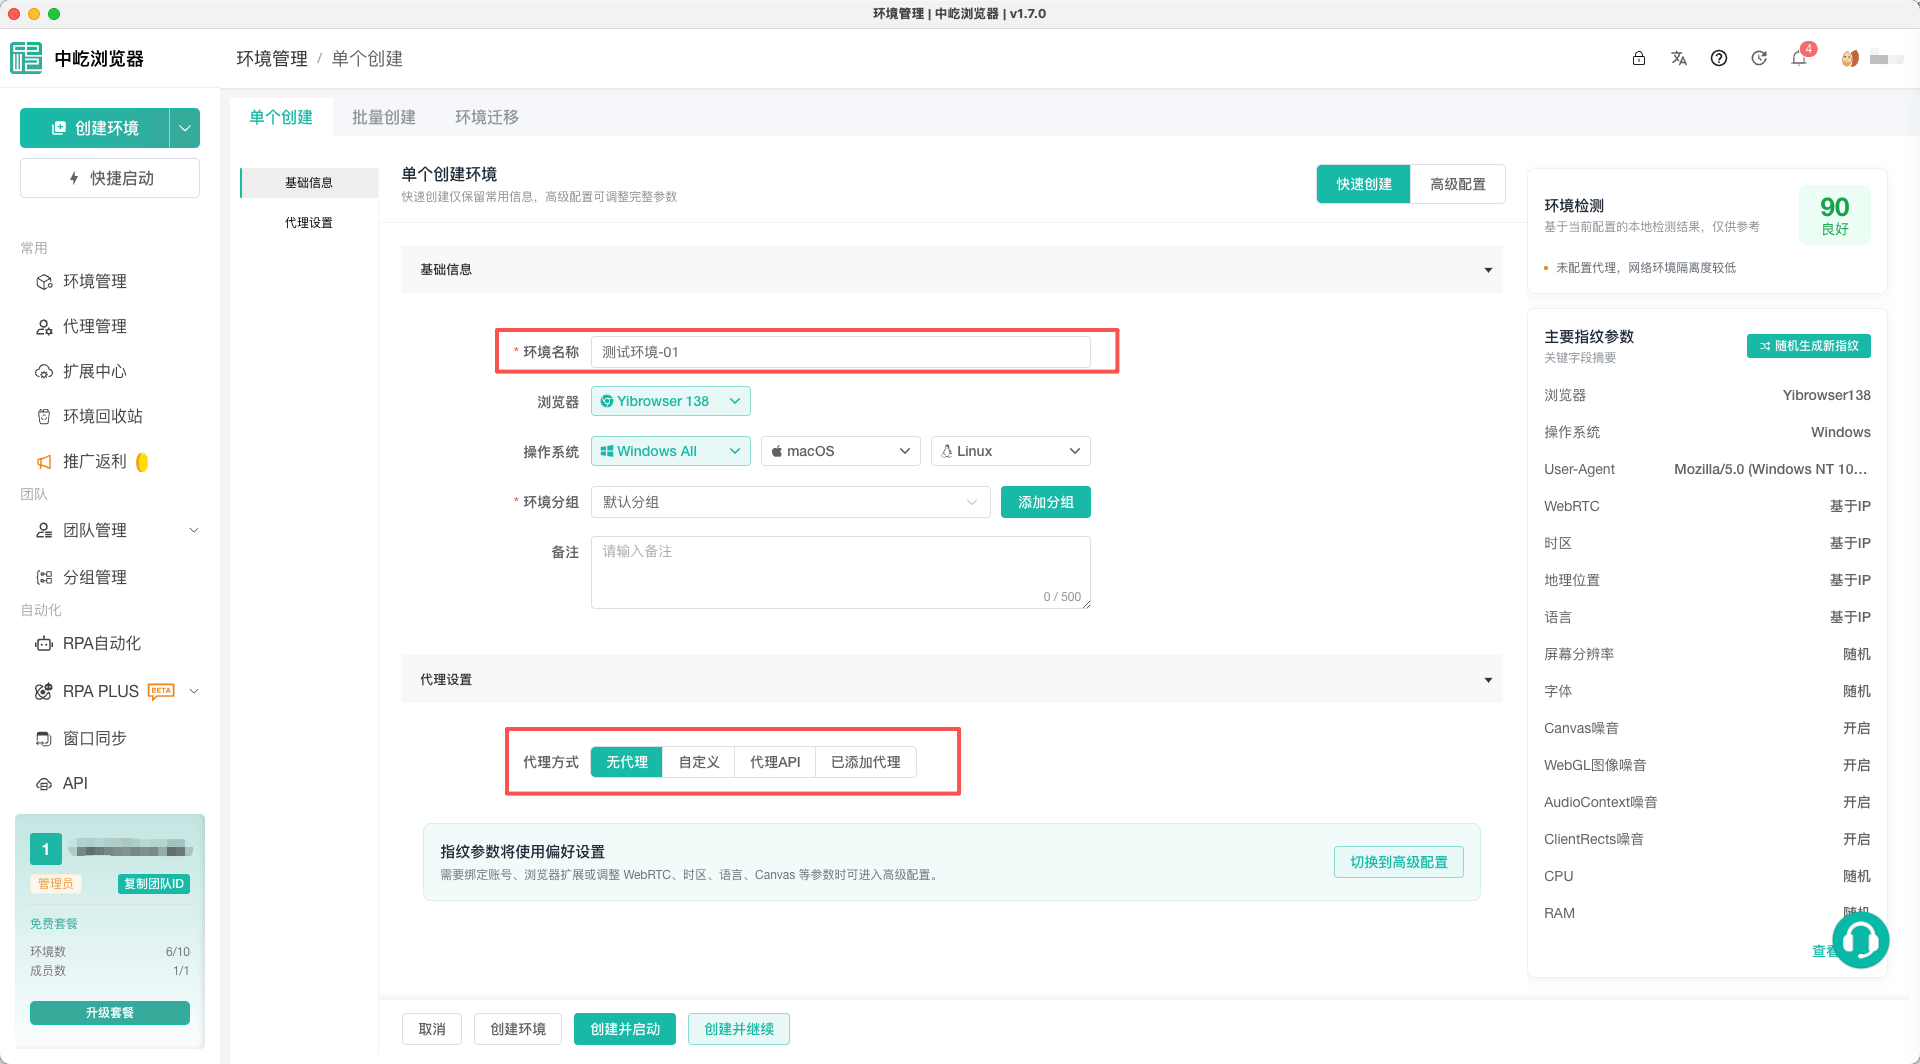
Field Reference
| Field | Description | Recommendation |
|---|---|---|
| Profile name | Identifies the profile in the profile list | Combine the account, platform, or purpose in the name |
| Browser engine and operating system | Determines the profile's base browser configuration | Keep the defaults for your first profile |
| Proxy settings | Specifies the network egress used by the profile | Confirm the protocol and port supplied by your proxy provider |
| Browser fingerprint | Stores the profile's browser characteristics | Keep the defaults until you understand the settings, and avoid changing them frequently |
Verify the Result
Return to the profile list and confirm that the new profile is saved and ready to launch. If you configured a proxy, use the test option before saving to confirm that the proxy is available. Local proxy tests are not supported in the web app and must be performed in the desktop client. For details, see Test a Proxy and Assign a Proxy to a Browser Profile.
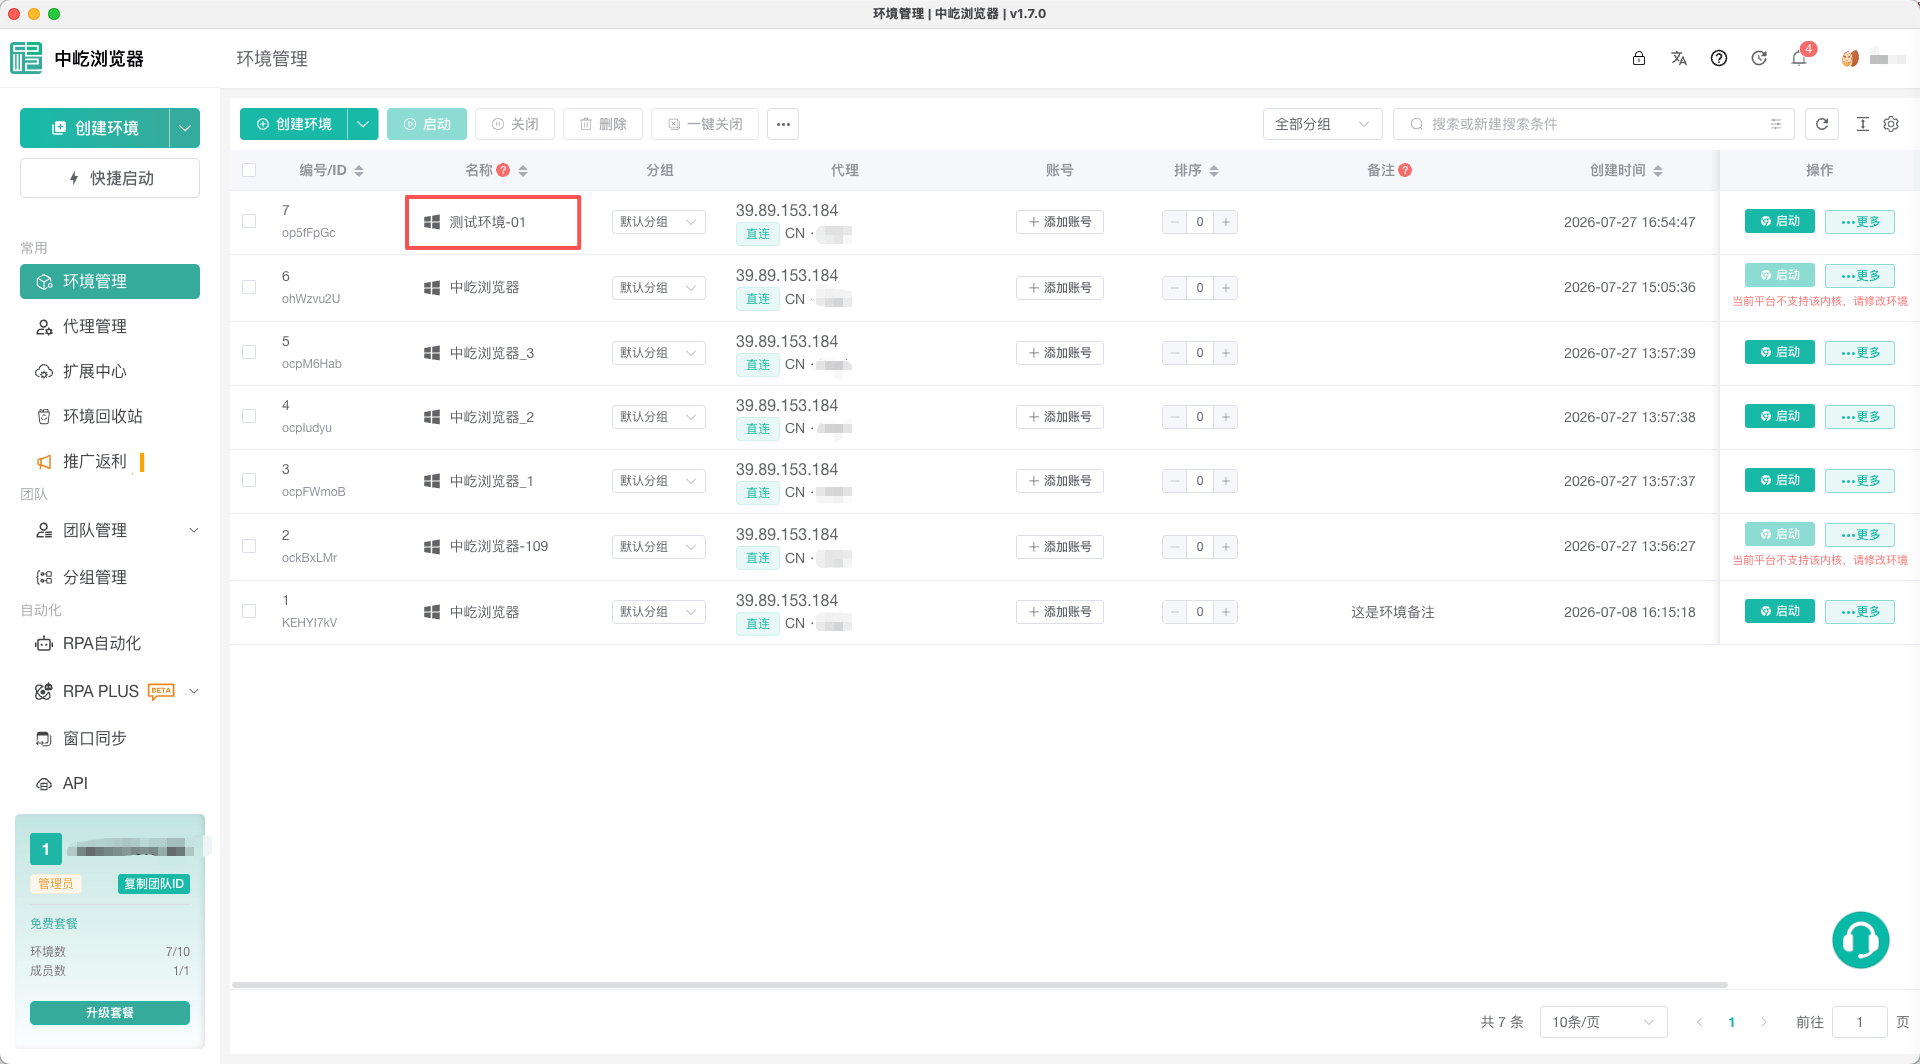
Next, read Launch a Browser Profile and open your target website in the new profile.