RPA Overview
RPA is the visual automation tool in ZYBrowser. Combine actions such as opening webpages, clicking elements, entering content, extracting data, and evaluating conditions into a workflow, then run it automatically in selected browser profiles.
Reuse one workflow across multiple profiles and execute it immediately, on a schedule, or repeatedly. Runtime statuses and logs are stored in Run History for verification and troubleshooting.
Before You Begin
Confirm that:
- The ZYBrowser desktop client is installed and you are signed in. Task execution and local scheduling depend on the client and cannot run solely in the web app.
- At least one browser profile exists, as described in Create and Edit a Browser Profile. Debugging and task binding allow only profiles whose engine is supported on the current platform.
- A suitable debug profile is available. Debugging tries to connect to a running profile first and prepares a new runtime only when reuse fails.
- Test pages and data are ready so debugging does not affect production work.
Feature Entries
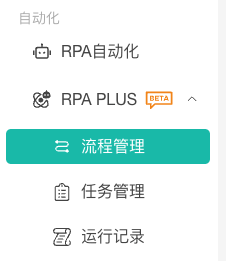
Expand RPA in the client sidebar to access:
- Workflow Management: Create, edit, copy, import, export, and share workflows.
- Task Management: Select a workflow, bind profiles, and configure execution.
- Run History: Review formal task statuses and detailed logs.
The workflow editor has no separate menu entry. Create or open a workflow from Workflow Management to enter the editor.
Core Concepts
These objects separate automation design from execution:
| Object | Purpose |
|---|---|
| Workflow | Defines what the automation does through nodes, connections, variables, and workflow settings |
| Node | Represents an operation such as opening a website, clicking an element, waiting for a page, or processing data |
| Browser profile | Provides the runtime with its own account, cookies, proxy, and browser data |
| Task | Defines which workflow runs in which profiles, when it runs, and its concurrency rules |
| Run record | Stores status, timing, and detailed logs for each formal task execution |
In short, the workflow defines what to do; the task defines where, when, and at what concurrency to do it.
Automation Capabilities
RPA groups nodes by purpose:
- Page Actions: Manage tabs, open websites, click, type, scroll, take screenshots, upload files, and run JavaScript.
- Keyboard and Wait: Send keys or combinations, wait for fixed or random durations, and wait for elements or network requests.
- Data Collection: Read URLs, page elements, clipboard data, cookies, and network requests, and import or save files.
- Data Processing: Manage variables, extract text, parse JSON, and select specified or random fields.
- Flow Control: Use conditions, loops, groups, and loop exits to control execution.
The Node Reference describes individual configuration in detail.
Workflow Management
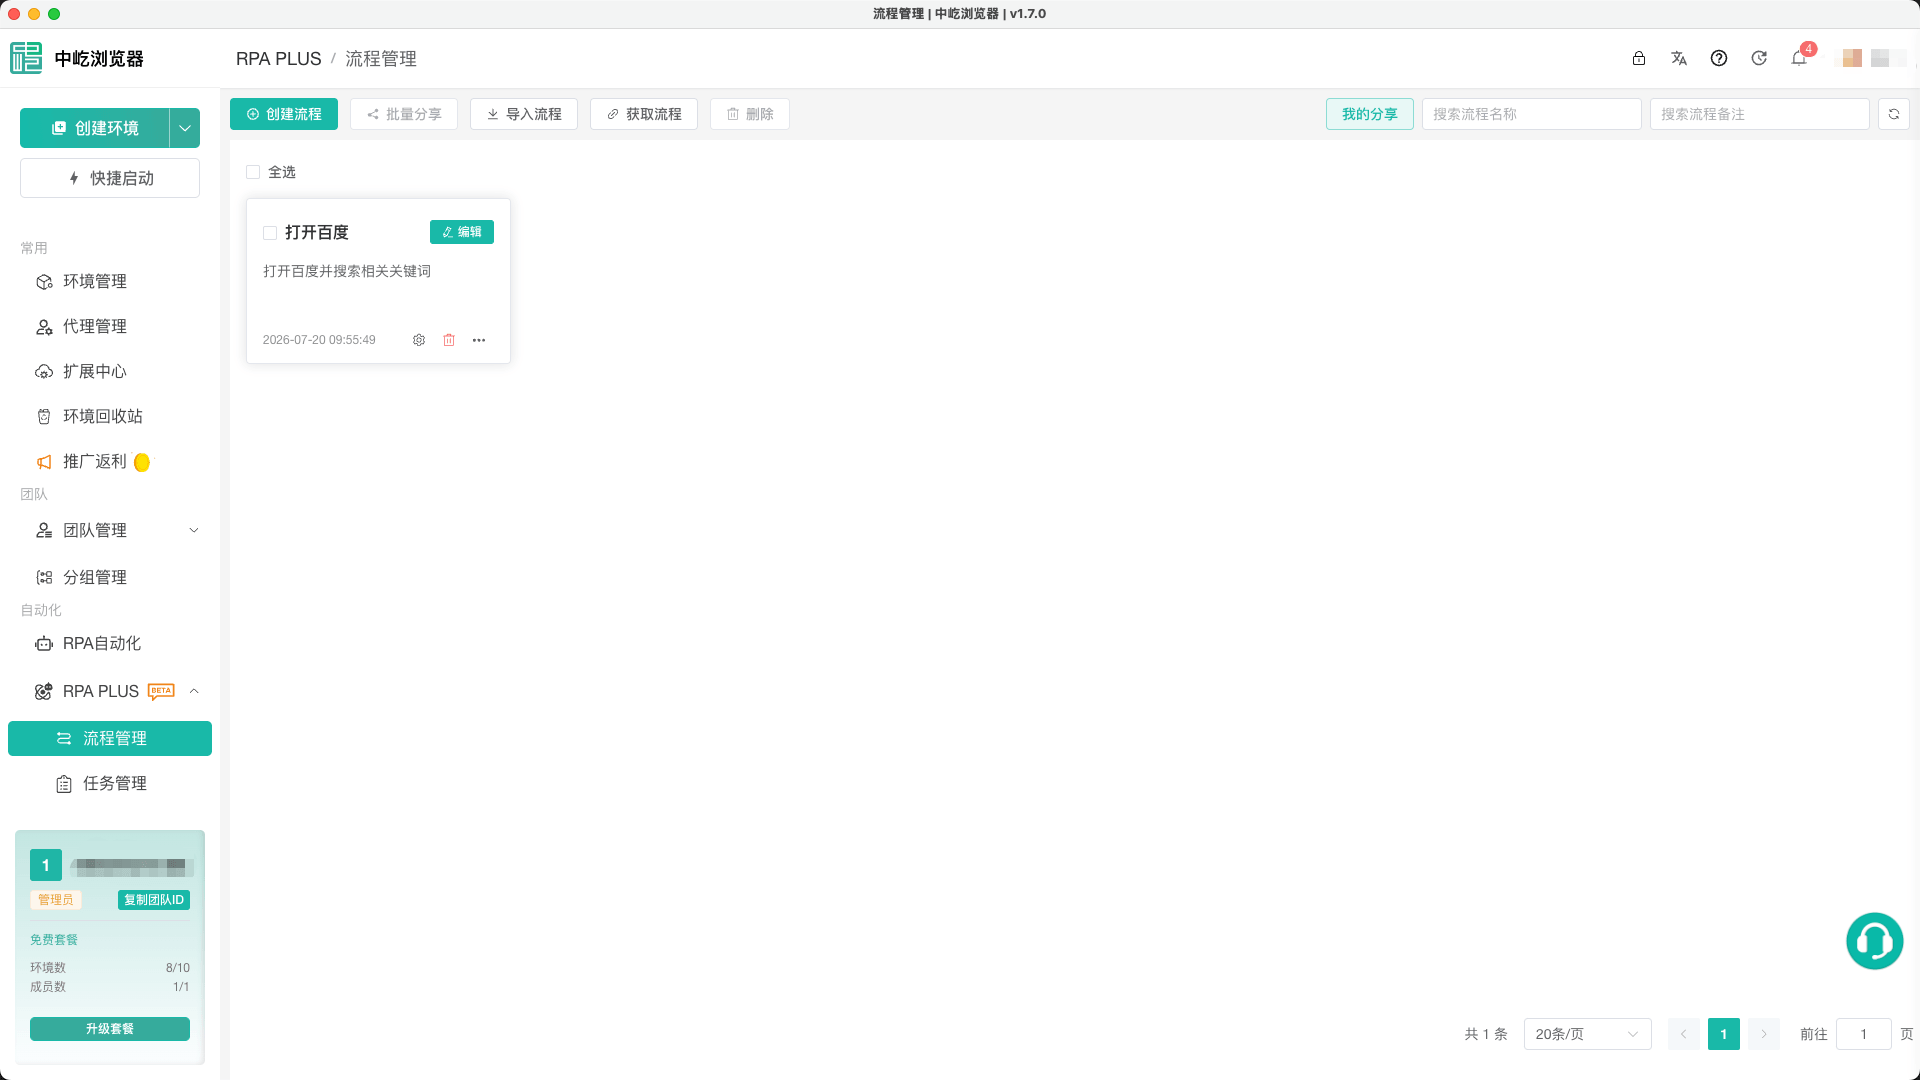
Workflow Management lists automation workflows for the active account. Search by name or notes and edit details, copy a template, configure settings, export, share, or delete a workflow.
It is also the central entry for new workflows, imports, and workflows received through a share code. Click a workflow card or Manage to enter the editor.
Workflow Editor
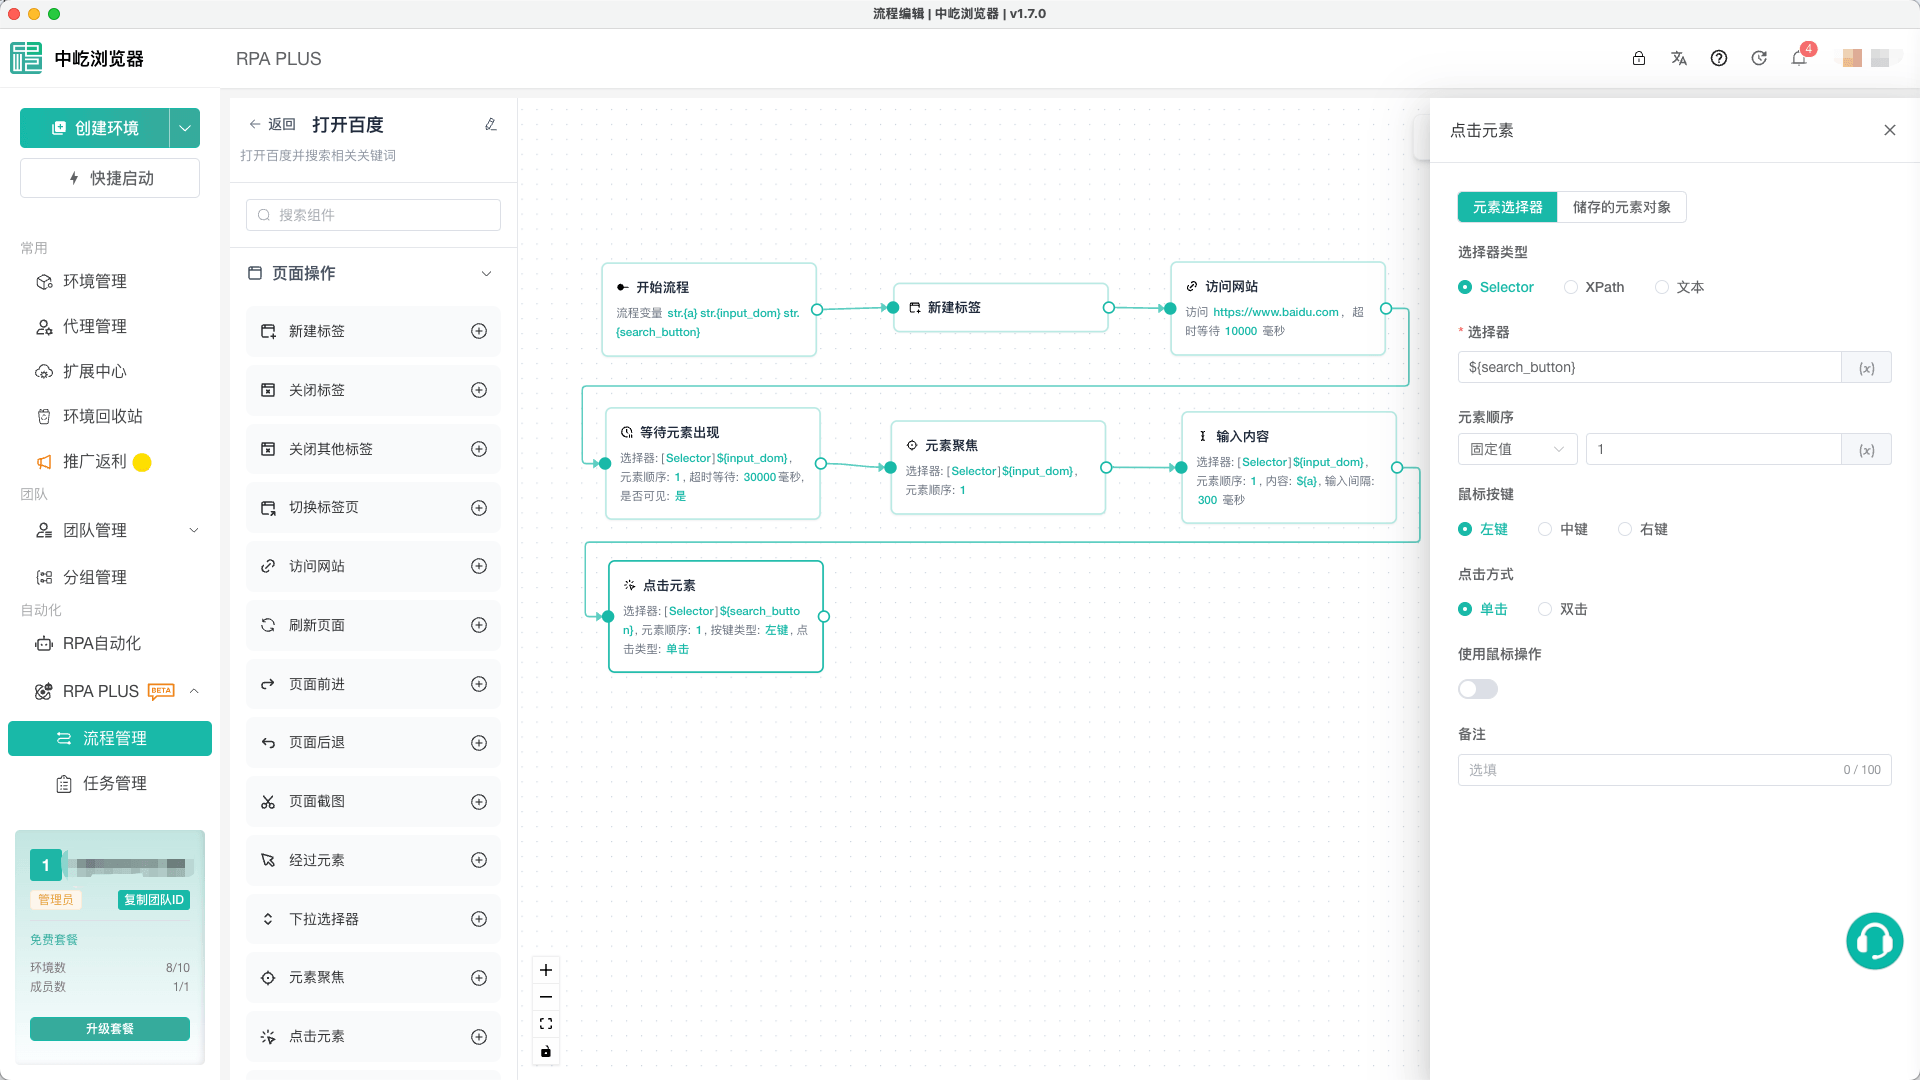
The editor contains three main areas:
- Node library: Find nodes by category and drag them or use the Add button to place them on the canvas.
- Canvas: Arrange nodes and connect their execution order; includes search, undo, redo, Auto Layout, and grouping.
- Node configuration panel: Configure inputs, element location, timeouts, output variables, and error handling for the selected node.
The toolbar also provides import, export, workflow settings, debug logs, and debugging. Select an available browser profile for debugging. The workflow runs from the current canvas, and its logs appear directly in the editor.
Task Management
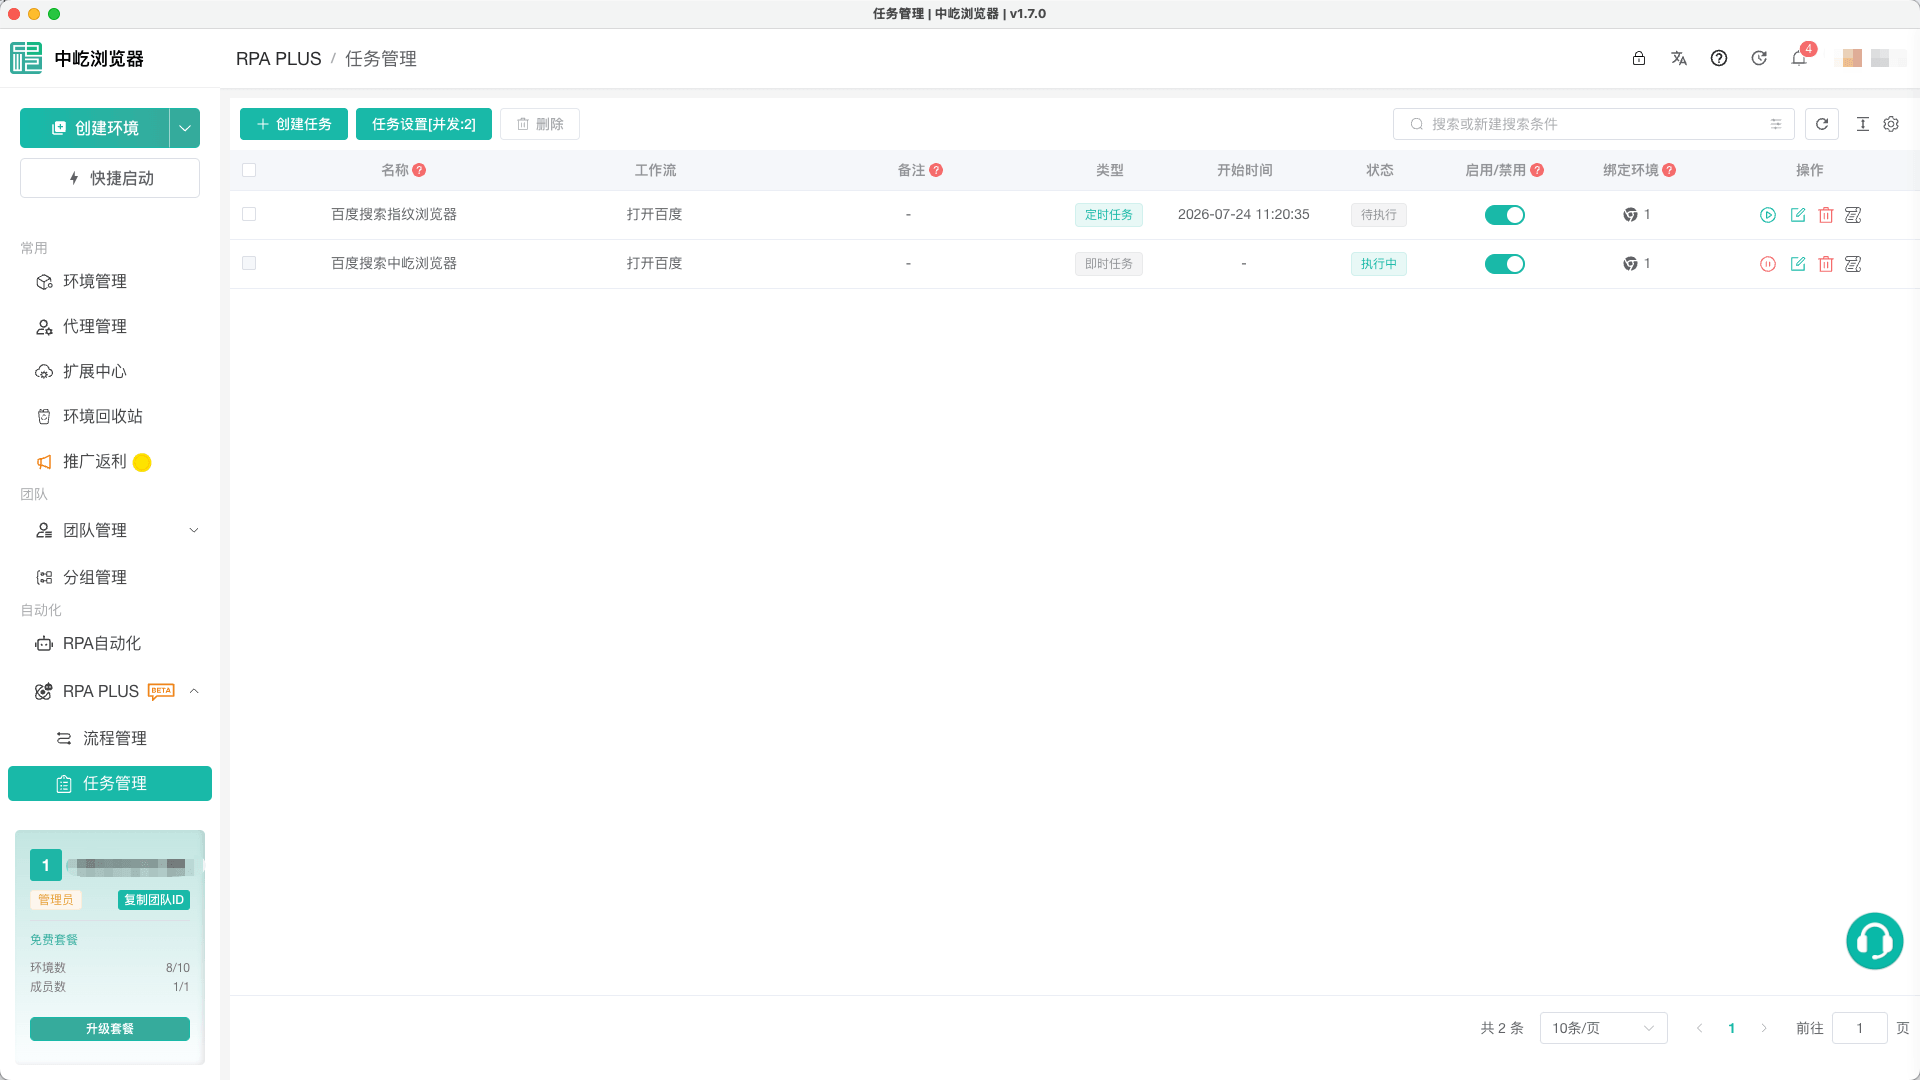
After debugging, create a formal task under Task Management. A task selects a workflow, binds at least one browser profile, and can configure profile concurrency, task timeout, and notes.
RPA supports three task types:
- Run Now: Starts immediately after saving or manually from the task list.
- Run Once: Executes once at a specified start time.
- Repeat: Runs at a minute, hour, or day interval from the start time until the end time.
The task list displays type, start time, runtime status, enabled state, and bound profile count, with actions to start, stop, edit, delete, and view logs.
Run History
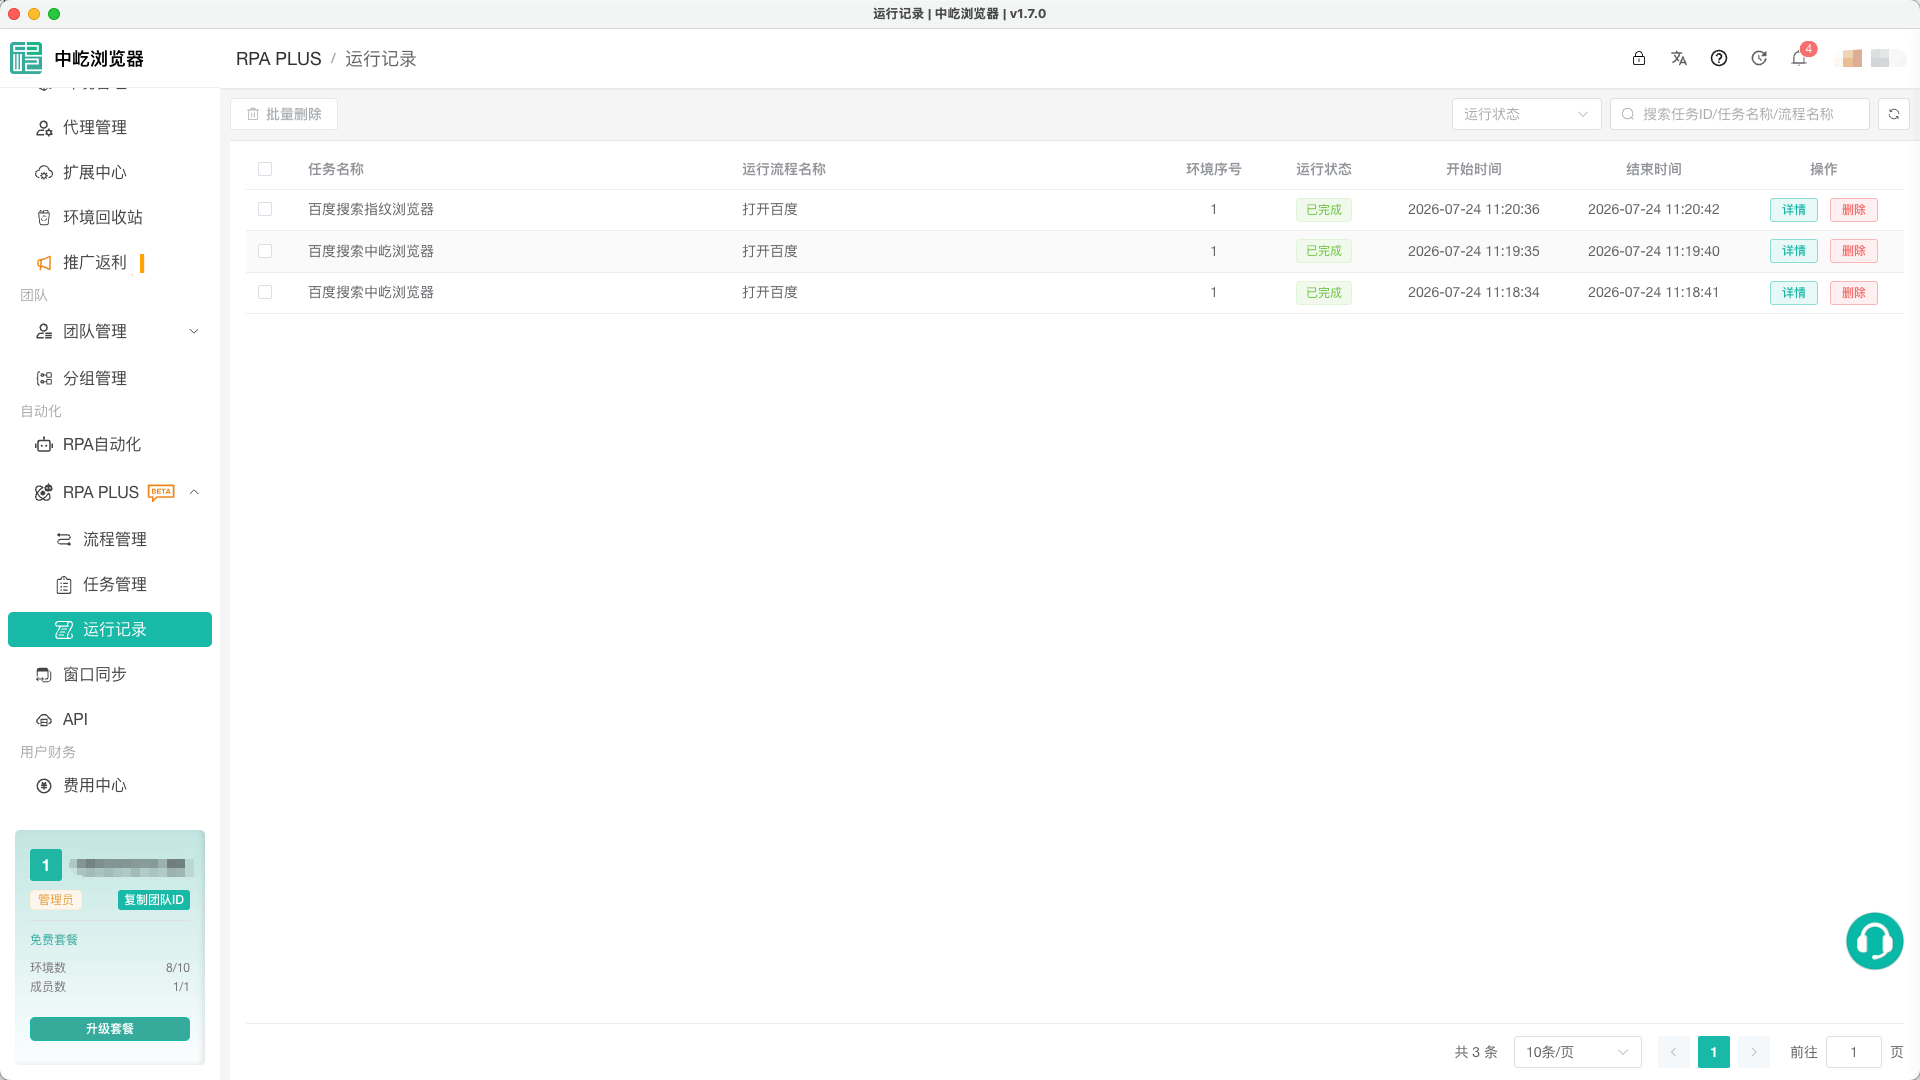
Run History displays the result of each formal task execution, including task name, workflow name, profile row number, status, start time, and end time.
Filter by status or search by Task ID, task name, or workflow name. Open details to review node logs and exceptions in execution order. If the workflow created a file, the log can open its directory.
Debugging Compared with Formal Execution
| Comparison | Workflow debugging | Formal task |
|---|---|---|
| Entry | Workflow Editor | Task Management |
| Executed content | Workflow currently in the editor | Saved workflow assigned to the task |
| Runtime profile | One debug profile selected each time | One or more profiles bound to the task |
| Primary purpose | Validate node configuration and workflow logic | Execute continuously according to schedule, concurrency, and timeout settings |
| Log location | Debug Logs in the editor | RPA Run History |
Recommendation
After changing a workflow, save and debug it again before formal execution. This prevents tasks from using an unverified configuration.
Basic Process
A complete RPA process generally follows these steps:
- Create a workflow under Workflow Management and enter a recognizable name and notes.
- Add nodes, connect them, and configure workflow variables in the editor.
- Debug with a test profile and correct node configuration based on the logs.
- Save the workflow and create a task with bound browser profiles.
- Configure task type, execution time, concurrency, and timeout, then enable the task.
- Review Run History. For an error, begin with the first failed node.
Next Steps
- Core Concepts and Variable Types: Learn nodes, variables, data types, and reference syntax.
- Create an Automation Workflow: Build and debug a complete first workflow.
- Workflow Management: Understand workflow cards, search, copying, and batch actions.
- Use the Workflow Editor: Learn the canvas, nodes, connections, and editing tools.
- Variables and Data: Learn workflow, system, and node output variables.
- Task Management and Scheduling: Configure profiles, concurrency, and execution times.
- Run History: Review logs and diagnose task errors.